Healthy soils are full of life: every tablespoon of healthy soil contains billions of bacteria, fungi, and other microbes that are critical to growing healthy plants. But how do you measure soil health when microbes are too small to see? Here are five simple soil health tests that work as well in your yard or garden as they do on a farm or ranch.
1. Get Your Hands Dirty
This first test couldn’t be any easier: just take a scoop of soil and hold it in your hands. Notice what it feels like, looks like, and smells like.
Healthy soil is dark and it binds together. It should look like chocolate cottage cheese with air pockets, worm holes, and plant materials bound together. If it sifts through your fingers, you are missing the structure provided by healthy fungi in the soil. On the other hand, if it feels dense like a brick and breaks instead of tearing, you may not have enough organic matter to balance the clay.
Healthy soil has a pleasant “earthy” smell, the result of actinomycetes, a class of bacteria that live in healthy soil. If your soil has no smell, or (worse!) you get a whiff of ammonia or rotten eggs, you have a problem. Read on for actions you can take to improve the health of your soil.
2. Count Your Worms

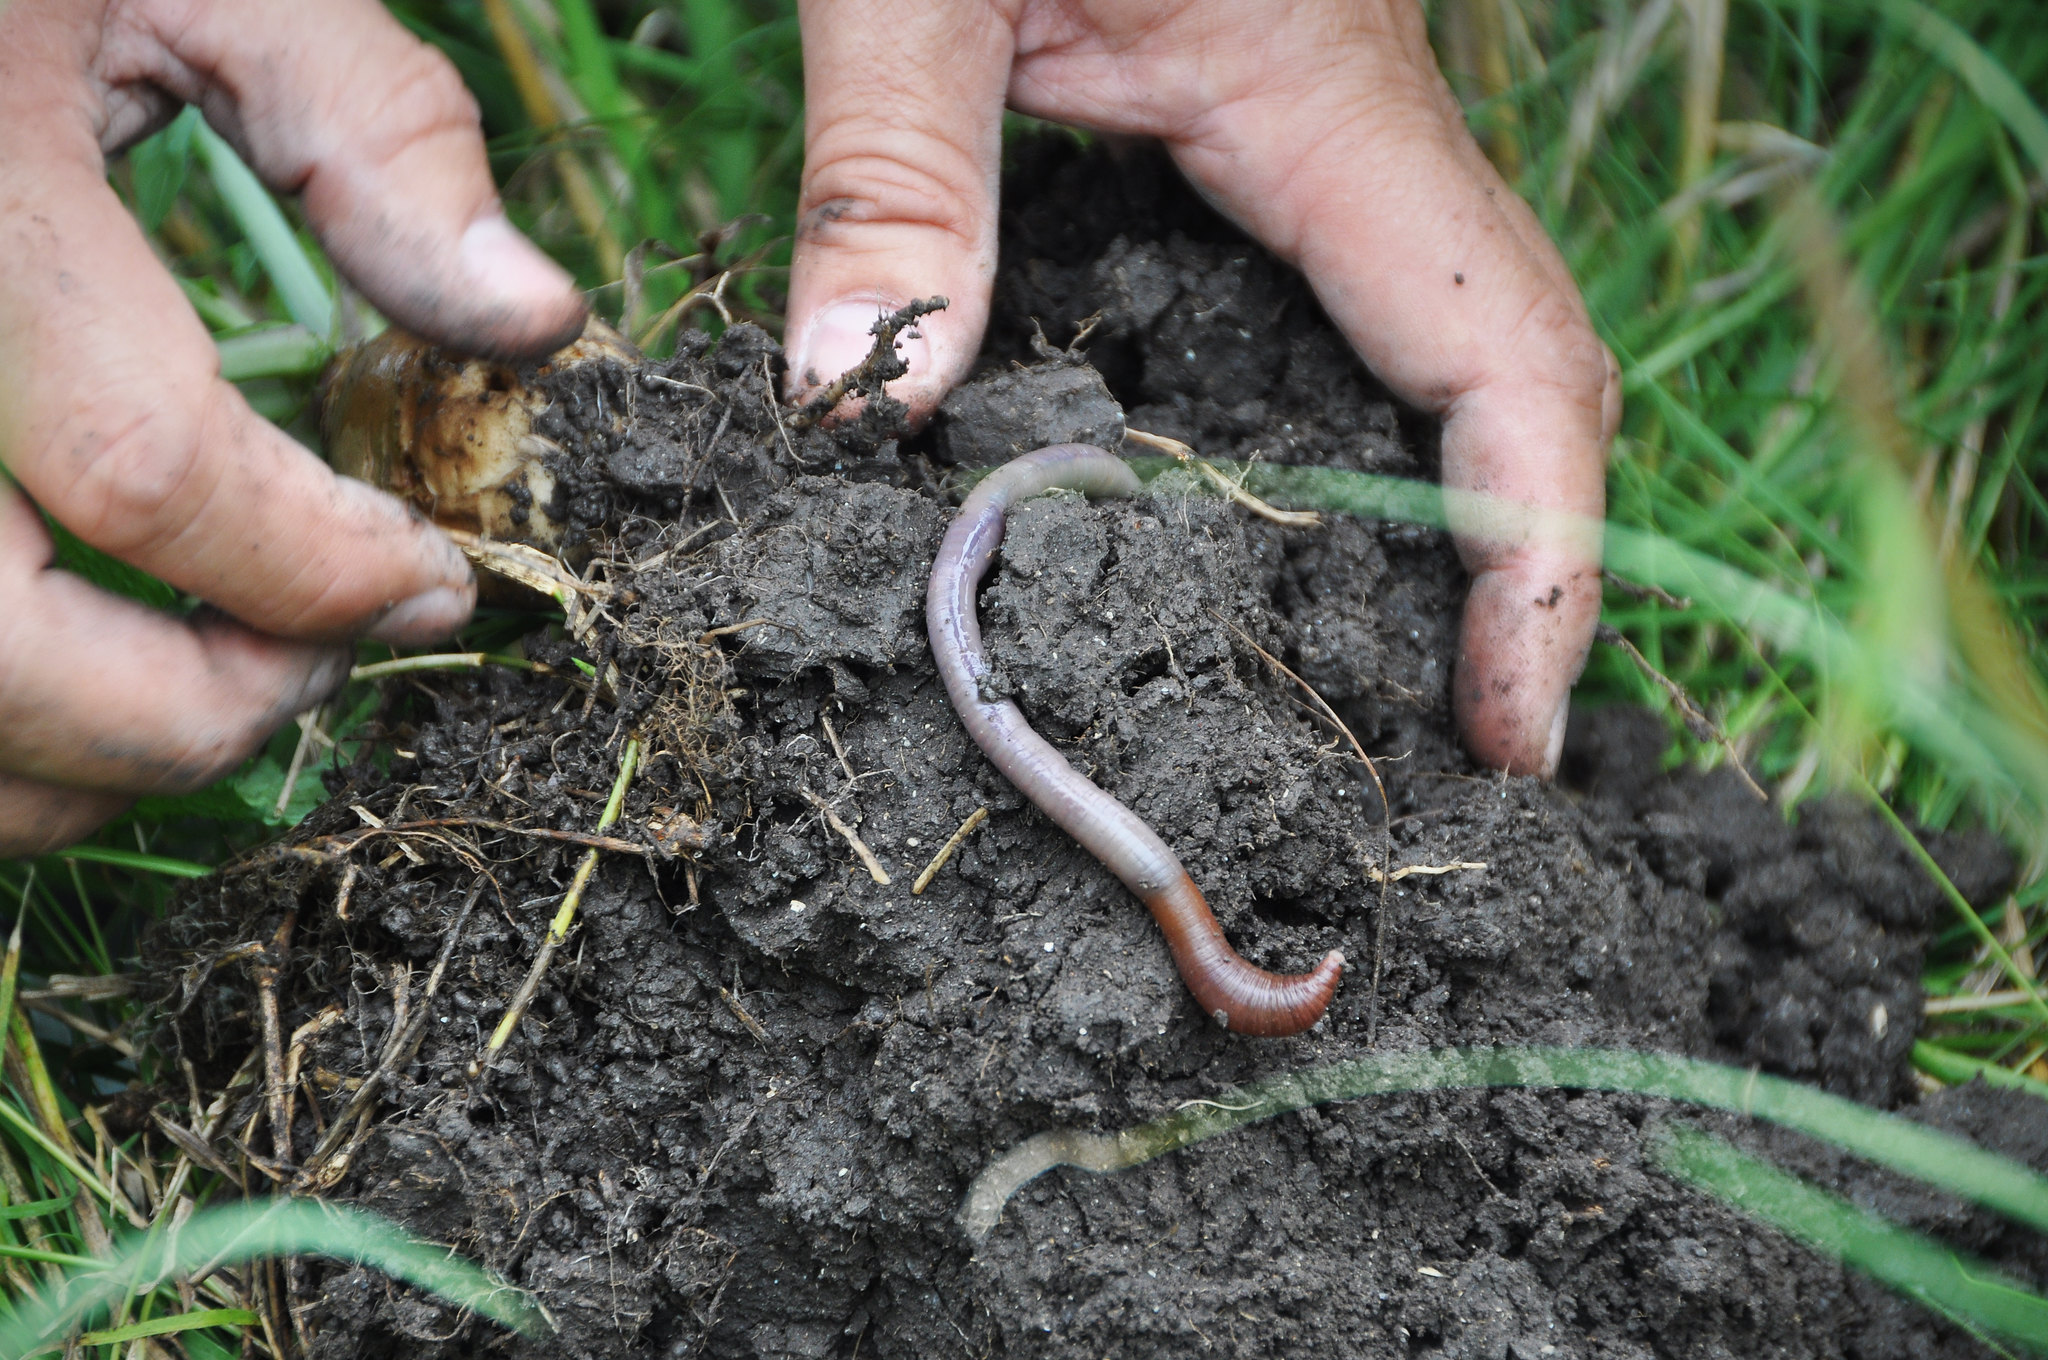
Worms are one of the many critters that live in the soil. Earthworms are native to North America, although glaciers wiped them out in the northern part of the USA thousands of years ago. Various species of earthworms have repopulated much of the country, and when you find earthworms, nematodes, and other worm-like critters, they are a good indicator of plentiful organic matter and healthy soil.
For this second test, dig up a shovel-full of soil, place it in a dishpan or on a tarp, and carefully sort through it to count the earthworms and worm-like critters. The more you find, the better! If there are a dozen or more, your soil is in pretty good shape. 5 or less could mean there’s trouble underground, and a worm count between five and 12 indicates you have opportunities to boost the health of your soil.
3. Poke Around
For test number three, grab a long metal or wood shish kabob skewer from your kitchen, or use a wire surveyor flag, and push it into the soil.
If you can push the skewer or wire into the soil a foot or more easily, that is a good sign that you have lots of tiny air pockets in the soil. Beneficial fungi, bacteria, and roots create structure in healthy soil, including pockets of air that absorb water like a sponge. Healthy soil by volume is actually about half sand, silt, clay, and organic matter, and half air and water.
If the skewer bends or breaks a few inches in, or if you need to pound it to drive it deeper, you have a problem – you don’t have enough of those pockets of air and water. Like your skewer, the roots of your plants will have trouble pushing in far enough to find nutrients and water.
Try your skewer in several spots (you might have just hit a rock the first time). If it stops at the same depth every time, you might have a "plow pan," a layer of compacted soil that results when soil is rototilled or disked at the same depth over and over. (Gardening tip: Use plants with a long heavy taproot – like turnips, beets, sunflowers, clovers, or daikon radishes – to break through a plow pan.)
If you found a hard crust on your soil, planting just about anything will solve the problem. Soil that is covered by plants is protected from the sun, while soil left bare gets baked.
4. Water Infiltration Test

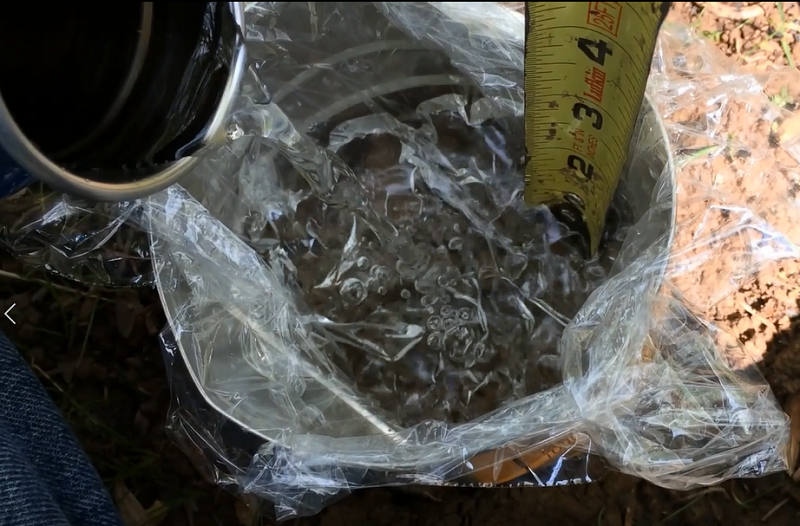
When water soaks in fast, that’s an indication of healthy soil. For this fourth test, first find an empty can (like a coffee can) and cut the bottom out. You’ll also need to round up some plastic wrap, a timer, a wooden board, a hammer, and a knife or pair of scissors.
With your materials in hand, head out to a wet patch of soil, or make your own by pouring water onto the ground until it appears saturated. Once the soil is completely soggy, use the knife or scissors to remove vegetation and leaf litter from the surface of your test area. Push the can into the soil at least 3-4 inches. Use the board and hammer to pound it in if needed. Gently firm the soil along the inside of the can to eliminate any obvious gaps. Finally, use plastic wrap to line the inside of the can. (That is, make a sort of bag inside the can.)
Now that your experiment is all set up, pour enough water into the can to fill it 1” deep. Start your timer, then pull out the plastic wrap to let the water come in contact with the soil. Stop the timer when the water has disappeared, leaving just a glisten on the surface. To confirm the results, pour in a second inch of water and start the timer again. (For this second round, the plastic wrap is less important, though you can use it again if you want to.) If you get a similar result, you have a good reading.
If the water sinks into the soil in two minutes or less, your soil is in really good shape. Anything under 10 minutes is pretty healthy soil. If it takes a half hour or more, you have serious problems – when that heavy rain comes, most of it will run off instead of soaking in to supply your plants for months to come.
Watch a farmer demonstrate this test on healthy soil and on less healthy soil.
5. Soil Your Undies
Many of the microbes in your soil eat dead plant material – and by doing so, they free up nutrients for use by plants that are still alive and growing. Test number five is a fun and easy way to see those microbes at work.
Wash a pair of 100% cotton underwear, then bury them in the top 6” of your soil and mark where you buried them. Wait six weeks, then dig up the underpants and rinse them in a bucket of water. How do they look?
In healthy soil, the bacteria and fungi will have broken down all of the cotton, leaving only the elastic bands (which are made from petroleum that soil microbes won’t eat). In soil devoid of healthy bacteria and fungi, the undies might look like you could throw them in the laundry and wear them again. If the cotton looks shredded or partly broken down, you can take action to help your microbe population.
Restoring Your Soil to Health
The results you get from these tests will depend on your soil type – but also on the climate of your region, the season, and other factors. Each result will give you a piece of the soil health puzzle.
The tests work best as a way to assess differences between parts of your garden or yard, or when done regularly to track changes in your soil health over time. Record your results from each testing site to keep track of what your soil is like today and how it changes over time. This way, you’ll be able to target your efforts to boost soil health in your garden.
If your soils aren’t as healthy as they could be, there are changes you can make. Increase the diversity of your plantings, stop tilling your soil, protect your soil with ground covers or mulch, reduce or eliminate your use of chemicals, and use compost to add nutrients and organic matter. Try out our soil health advice, repeat these tests at least once a year, and soon you’ll see the difference your efforts are making!
See all five tests demonstrated in a video
Get more tips for an environmentally friendly yard